Hey there, fellow beard enthusiasts!
Are you ready to level up your facial hair game? We’ve all seen those incredibly sharp, seamless beard fades that just scream 'groomed to perfection.' It’s that magical transition from shorter hair near your ears and sideburns to the fuller glory of your beard, creating a clean, polished look that can truly transform your entire appearance. If you've ever admired a perfectly blended beard and thought, 'How do they do that?' – well, my friend, you’ve come to the right place.
Today, we’re diving deep into the art of mastering the beard fade. It might sound a bit intimidating at first, but trust me, with the right tools, a little patience, and this step-by-step guide, you’ll be rocking a professional-looking fade in no time. Think of me as your personal beard-guru, walking you through every snip and blend. So, grab your grooming gear, and let’s get that fade looking flawless!
What is a Beard Fade?
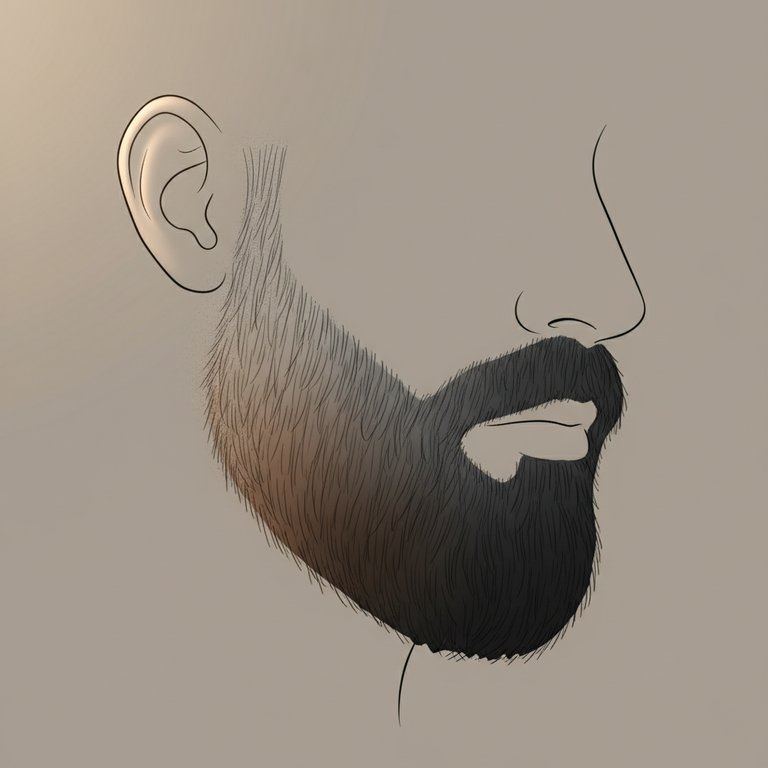
So, what exactly is a beard fade? Simply put, it's a gradual transition of hair length. Instead of a harsh line where your sideburns meet your beard, or where your beard meets your haircut, a fade creates a smooth, almost invisible gradient. It starts very short, often down to skin or stubble, around your sideburns and temples, and progressively gets longer as it moves down towards your jawline and the fuller part of your beard. This technique isn't just for barbers anymore; it's totally achievable at home with a bit of practice. It gives your beard a structured, intentional look, highlighting your jawline and adding a sophisticated touch to your overall style. It's like contouring for your beard – defining and enhancing your best features!
Why Go for a Beard Fade?
Beyond just looking incredibly sharp, there are several fantastic reasons to consider a beard fade:
- Clean & Polished Look: A fade instantly elevates your grooming game, making your beard look meticulously cared for and intentional. No more messy, disconnected sideburns!
- Defines Your Jawline: By gradually shortening the hair on the sides, a fade can help create the illusion of a stronger, more defined jawline. It's a fantastic way to frame your face.
- Versatility: Whether you prefer a short, neat beard or a longer, more majestic one, a fade can be incorporated to complement almost any beard style. It simply cleans up the edges.
- Modern Appeal: The fade is a timeless yet thoroughly modern look that keeps your facial hair looking fresh and on-trend.
- Seamless Integration: If you get a faded haircut, a beard fade creates a beautiful, continuous flow from your hair down into your beard, making your entire head of hair look cohesive and well-styled.
It's truly a game-changer for anyone looking to refine their beard aesthetic.
Essential Tools for the Job
Before we dive into the nitty-gritty, let’s make sure you’ve got all your weapons of choice ready. Having the right tools makes all the difference between a frustrating experience and a smooth, successful fade.
- Quality Electric Clippers: This is your primary tool. Invest in a good pair with various guard attachments. Adjustable levers on the clippers themselves are a huge bonus for finer blending.
- Trimmer/Edger: For those super sharp lines and cleaning up around the edges, neck, and cheeks. These are usually smaller and more precise than clippers.
- Detailer/T-Blade Trimmer (Optional but Recommended): For getting really close to the skin for that skin-fade effect, or for intricate detailing.
- Mirror: A good, well-lit mirror is non-negotiable. A handheld mirror can also be helpful for checking angles.
- Comb: For detangling your beard and guiding your clippers.
- Beard Brush: To brush out loose hairs and ensure your beard is neat before and after trimming.
- Beard Oil or Balm: Essential for post-trim hydration and keeping your beard healthy and soft.
- Cape or Old Towel: To catch all those stray hairs and keep your clothes clean.
Trust me, having these ready will make the process so much smoother.
Your Step-by-Step Guide to a Seamless Beard Fade
1. Prep Work: Setting the Stage
Alright, let's get down to business! The first step to a successful beard fade is all about preparation. Don't skip this part – it sets you up for success.
- Clean and Dry: Always start with a clean, dry beard. Washing your beard removes any products, dirt, or oils that might interfere with your clippers. A dry beard ensures the hair stands out naturally, making it easier to cut evenly.
- Comb It Out: Thoroughly comb your beard downwards and outwards to remove any tangles and ensure all hairs are lying in their natural direction. This also helps you see the true length and density of your beard.
- Choose Your Lengths: This is crucial. Decide how long you want the main body of your beard to be, and then choose a few shorter guard sizes for your fade. You’ll typically use 3-4 different guard lengths to create a smooth transition. For example, if your main beard is a #4, you might fade down using a #3, #2, and then a #1 or even shorter at the sideburns. Write them down if you need to!
This prep work takes just a few minutes but will save you headaches later on.
2. The Initial Trim: Establishing Length
Before you even think about fading, you need to establish the overall length of your main beard. If your beard is already at your desired length, you can skip this step or just clean it up slightly.
Using your longest chosen guard (e.g., #4 or #5), trim the bulk of your beard. Go against the grain for an even cut, but be mindful of your desired shape. You’re not fading yet; you’re just getting the main canvas ready. Think of this as sculpting the main shape you want to maintain. This step ensures that when you start fading, you're blending into an already consistent length.
3. Beginning the Fade: Your First Guard
Now, let's get into the actual fading! This is where the magic starts.
Attach your second longest guard (e.g., if your main beard is #4, use a #3) to your clippers. Identify your 'fade line' – this is typically around the top of your ear or just below your temple, where you want the shortest part of your fade to begin. Using an upward, scooping motion, start trimming from your sideburns and work your way up towards this imaginary fade line. Don't go too high! You’re aiming for the bottom third or half of the area you want to fade. The key is to scoop outwards as you reach the top of your cutting zone to avoid creating a harsh line.
4. Blending It Out: Moving to Shorter Guards
This is where the 'fade' truly comes to life. You'll repeat the scooping motion, gradually using shorter guards.
- Next Shorter Guard (e.g., #2): Switch to your next shorter guard. Now, you’ll work just below the area you cut with the previous guard. Start from the bottom of your sideburns again and go up, but stop about half an inch or so below where you stopped with the longer guard. Again, use that gentle scooping motion to prevent lines. You're essentially creating another, shorter band of hair.
- Shortest Guard (e.g., #1 or no guard with lever open): For the very bottom of your fade, typically around the sideburns and very upper cheek/temple area, use your shortest guard. This might be a #1, or even just your clippers with the lever open (if they have one) for a very close cut. Work in an even smaller zone, focusing on the very bottom portion of your sideburns and where your beard meets your natural hairline or head hair. Always scoop out!
- The Lever Trick (if applicable): If your clippers have an adjustable lever, this is your secret weapon for seamless blending. You can use the lever to incrementally adjust the blade length between guards, allowing for even finer transitions. For example, after using a #2, you can use the #1 guard with the lever slightly open, then fully closed, to create micro-gradients.
Take your time here. It's better to go slow and do multiple passes than to cut too much too fast.
5. The Clean Up: Edging and Defining
Once you’re happy with your fade, it’s time to sharpen things up.
- Neckline: Using your trimmer without a guard, create a clean, natural-looking neckline. Don't go too high; find the point where your beard naturally starts to thin out under your jaw.
- Cheek Line: Carefully define your cheek line. You can go for a sharp, straight line or a softer, more natural curve. Use your trimmer and be precise.
- Stray Hairs: Use your trimmers or detailer to catch any rogue hairs that might be sticking out or messing with your smooth fade.
- Symmetry Check: Step back and check both sides in the mirror. Are they even? Does the fade look consistent on both sides? This is where a handheld mirror comes in handy.
6. Finishing Touches: Aftercare
You’ve done the hard work, now give your beard some love!
Rinse your face to remove any loose hairs. Then, apply a good quality beard oil or balm. This will moisturize your skin and beard, preventing dryness and itchiness, and leaving your newly faded beard looking healthy and shiny. Brush or comb your beard into place, and admire your handiwork!
Pro Tips and Tricks for a Flawless Fade
Mastering the fade takes a bit of practice, but these pro tips will help you get there faster:
- Practice Makes Perfect: Don't get discouraged if your first few attempts aren't barber-shop perfect. Every trim is a learning experience. You’ll get better with each try!
- Mirror, Mirror on the Wall: Use a large, well-lit mirror. A second, handheld mirror can help you see those tricky angles, especially on the back and sides.
- Lighting is Key: Good lighting is your best friend. Natural light is ideal, but a well-lit bathroom mirror works wonders. Bad lighting can hide imperfections, only for them to appear later!
- Don't Rush It: Patience is paramount. Rushing leads to mistakes. Take your time, make small passes, and check your work frequently.
- Start Longer, Go Shorter: Always begin with a longer guard than you think you need. You can always go shorter, but you can’t put hair back once it’s cut! This is especially true when blending.
- Clean Your Clippers: Keep your clipper blades clean and oiled. This ensures they run smoothly and cut efficiently, preventing snagging and uneven cuts.
- Hydrate and Nourish Your Beard: A healthy beard is easier to trim and style. Regular use of beard oil or balm keeps the hair soft, manageable, and looking its best.
Remember, this is a journey, not a race. Enjoy the process of becoming your own beard master!
Frequently Asked Questions About Beard Fades
How do I make my beard fade look smooth and natural?
The secret to a smooth, natural-looking fade lies in two key areas: using enough guard lengths and employing a gentle scooping motion. Don't try to go from a long guard straight to a very short one. Use at least 3-4 incremental guards (e.g., #4, #3, #2, #1). When using each guard, make sure you're flicking your wrist outwards and upwards as you lift the clippers away from your face. This scooping action helps to prevent harsh lines and creates a softer transition. Also, if your clippers have an adjustable lever, use it! It allows for even finer micro-adjustments between guard sizes, truly blurring those lines.
Why does my beard fade look choppy or uneven?
A choppy or uneven fade usually happens for a few reasons. Firstly, you might be pressing the clippers too hard against your skin, which can create divots. Use a light touch. Secondly, you might not be scooping out enough at the end of each pass, leaving a distinct line instead of a blend. Practice that flicking motion. Thirdly, going too fast or not using enough intermediate guard lengths can lead to choppiness. Slow down, use those incremental guards, and make sure your beard is clean and combed before you start. Sometimes, inconsistent lighting can also make it hard to see your progress, so ensure you're working in a well-lit area.
What's the best way to blend a beard fade into my haircut?
Blending your beard fade into your haircut is all about continuity. If you have a faded haircut, you want your beard fade to pick up where your hair fade leaves off. Use the same or similar guard lengths around your sideburns and temple area as your barber used for the lowest part of your hair fade. The key is to create a seamless flow from your head hair, through your sideburns, and into your beard. Pay close attention to the transition point – this is where your shortest beard fade guard should meet the shortest part of your haircut. Often, a skilled barber can do this best, but if you're doing it yourself, use a mirror to ensure the lines and lengths visually connect smoothly.
Can I really do a beard fade myself, or should I go to a barber?
Absolutely, you can do a beard fade yourself! Many beard enthusiasts learn to master this technique at home. It requires patience, the right tools, and a willingness to learn from practice. Starting with a slightly longer fade (not a skin fade) is often easier for beginners. However, if you're nervous, want a super precise skin fade, or just prefer a professional touch, a skilled barber is always an excellent option. They have specialized tools and years of experience. Think of doing it yourself as a skill you can develop over time. Start simple, build confidence, and you'll be fading like a pro.
How often should I touch up my beard fade to keep it looking sharp?
To keep your beard fade looking sharp and well-maintained, most people find that a touch-up every 1-2 weeks is ideal. The exact frequency depends on how fast your hair grows and how short you prefer your fade. If you have a very short, tight fade, you might need to touch it up more frequently, perhaps every 7-10 days. For a slightly longer, softer fade, every two weeks might suffice. Regular maintenance prevents the fade from growing out and looking messy, ensuring you always look your best.
What happens if I accidentally cut too much off during a fade?
Oh, the dreaded "oops" moment! If you accidentally cut too much off, don't panic. The immediate solution often depends on how much was cut. If it's a small section, you might be able to blend it into a slightly shorter fade on both sides to maintain symmetry. If a significant chunk is gone, you might have to commit to a shorter overall beard fade for a while, or even consider a shorter beard style until it grows back. Remember the golden rule: start with a longer guard and work your way down. Hair grows back, so it's not the end of the world, but it's a good lesson in taking your time and being cautious.
Should I use clippers or scissors for the blending part of the fade?
For the blending part of a beard fade, clippers are generally your best friend, especially for beginners. Clippers with various guard attachments are designed to create those gradual transitions smoothly and consistently. Scissors are fantastic for shaping the main body of the beard, trimming stray hairs, and adding texture, but achieving a smooth, even fade with scissors alone is a much more advanced technique that requires significant skill and practice. Stick to your clippers and their guards for the fade itself, and save the scissors for detailing and overall beard shaping.
Conclusion
And there you have it, my friends – your comprehensive guide to mastering the beard fade! It’s a technique that truly elevates your beard game, giving you that polished, intentional look that turns heads. Remember, practice is key, patience is your virtue, and having the right tools makes all the difference. Don't be afraid to experiment, start slow, and enjoy the journey of becoming your own beard grooming expert. You've got this! Now go forth and rock that perfectly faded beard with confidence.
Disclaimer: The information provided in this blog post is for general informational purposes only and is not intended as a substitute for professional advice. Always exercise caution and use grooming tools responsibly.